As an Amazon Associate, I earn from qualifying purchases
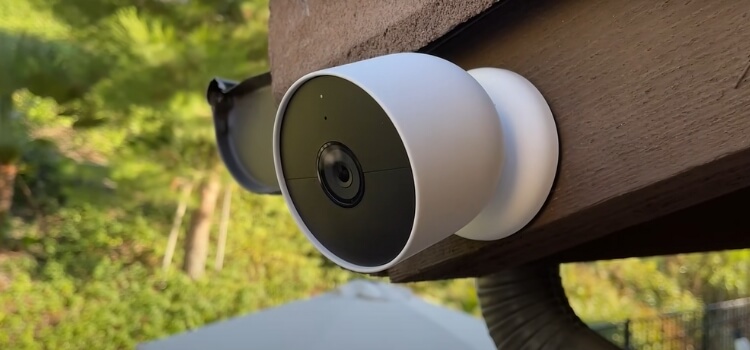
To reset a Nest camera, locate the reset button on the camera and press it for at least 10 seconds. This will reset the camera to its default settings.
Resetting a Nest camera can be necessary to troubleshoot issues or to prepare the camera for a new setup. Knowing how to reset your Nest camera is essential if you’re experiencing technical difficulties or simply want to start fresh. Following a few simple steps, you can easily reset your Nest camera and get it back up and running quickly.
In this guide, we will walk you through the process of resetting your Nest camera, ensuring that you can quickly and effectively address any issues that may arise.

Common Issues With Nest Camera
Nest cameras are designed to provide an additional layer of security to your home or business premises. However, like any other device, they can sometimes experience technical difficulties. Here are some of the most common issues with Nest cameras:

Connectivity Problems
One of the most common issues with Nest cameras is connectivity problems. There are several potential causes for this, such as weak Wi-Fi signals, interference from other devices, or outdated firmware. If your Nest camera is not connecting to your Wi-Fi network or is frequently disconnecting, there are several steps you can take to fix the issue:
- Move the camera closer to the router
- Reset your router
- Update your router firmware
- Update your Nest camera firmware
Software Glitches
Another common issue with Nest cameras is software glitches. This can occur when the camera’s firmware is outdated or corrupted. Some of the most common software glitches that users experience with Nest cameras include:
- Camera freezing or shutting down
- Camera not responding to commands
- Camera not recording or storing footage
If you are experiencing any of these issues, the first step is to check if your camera’s firmware is up to date. If not, update it immediately. If the issue persists, try resetting the camera to its factory settings. This will erase all settings and data, so make sure to back up any important footage before resetting the camera.
Preparing To Reset
Resetting your Nest camera can help resolve various issues. Before you start the process, it’s essential to gather the necessary tools and understand the factory reset procedure.

Gather Necessary Tools
Before proceeding with the reset, ensure you have the following tools ready:
- Small pointed object (e.g., a paperclip or pin)
- Access to a stable Wi-Fi network
- Access to a power source
Understanding Factory Reset
The factory reset restores the camera to its original settings, erasing any customizations or configurations. This process is irreversible, so it’s crucial to make sure that resetting is the necessary course of action.
Steps To Reset Nest Camera
When your Nest camera is not functioning properly, performing a reset can often resolve the issue. There are two main methods to reset a Nest camera: power cycling and performing a factory reset. Below, we’ll outline the steps for each method to help you get your Nest camera back on track.

Power Cycling The Camera
Power cycling the camera is a simple and effective way to reset the device. Follow these steps to power cycle your Nest camera:
- Unplug the camera from the power source.
- Wait for at least 10 seconds.
- Plug the camera back into the power source.
Performing A Factory Reset
If power cycling doesn’t resolve the issue, you may need to perform a factory reset. Please note that this will erase all settings and data associated with the camera, so proceed with caution. To perform a factory reset, use the following steps:
- Locate the reset button on the camera. It is usually a small indentation that requires a pointed object to press.
- Press and hold the reset button for at least 10 seconds.
- Release the button when you see the status light on the camera blink.
- Wait for the camera to restart and go through the setup process again.
Troubleshooting After Reset
Resetting your Nest Camera can be a helpful solution to fix a range of issues. However, after resetting, you may encounter problems with reconnecting to Wi-Fi or updating firmware. Here are some troubleshooting steps to help you get your Nest Camera back up and running:

Reconnecting To Wi-fi
If you’re having trouble reconnecting to Wi-Fi after resetting your Nest Camera, try the following:
- Make sure your Wi-Fi network is working properly.
- Check if your Nest Camera is within range of your Wi-Fi network.
- Restart your Wi-Fi router and try reconnecting your Nest Camera.
- Double-check your Wi-Fi network password and try reconnecting again.
If none of these steps work, try resetting your Nest Camera again and go through the setup process.
Updating Firmware
It’s important to keep your Nest Camera’s firmware up to date for optimal performance. If you’re having trouble updating the firmware after resetting your Nest Camera, follow these steps:
- Make sure your Nest Camera is connected to Wi-Fi.
- Open the Nest app and tap on the camera you want to update.
- Tap on “Settings” and then “Camera Info.”
- Scroll down to “Software Version” and tap on “Update.”
- Wait for the update to download and install.
- If the update fails, try resetting your Nest Camera again and going through the setup process.
By following these troubleshooting steps, you can fix common issues that may arise after resetting your Nest Camera. If you’re still experiencing problems, contact Nest Support for further assistance.
Advanced Tips For Persistent Issues
Learn advanced techniques to troubleshoot persistent issues with your Nest camera. Discover effective methods to reset your device effortlessly for optimal performance.
Advanced Tips for Persistent Issues If you’ve tried the basic troubleshooting steps and still experiencing persistent issues with your Nest camera, it’s time to explore advanced solutions. Here are some tips that can help you address complex problems effectively.

Contacting Support
If you’re unable to resolve the issues on your own, reaching out to Nest customer support can be beneficial. They have a team of experts who can provide personalized assistance and guide you through the troubleshooting process.
Checking For Hardware Damage
Inspect the camera for any visible signs of damage, such as frayed cables or physical impact. If you notice any issues, it’s important to address them promptly. Additionally, consider testing the camera in a different location to rule out environmental factors. Remember, addressing persistent issues may require more time and effort, but with the right approach, you can effectively resolve them.
Preventive Measures
Performing regular maintenance on your Nest Camera can help prevent issues and ensure optimal performance.
Protect your Nest Camera from power surges by using surge protectors, which can safeguard against electrical damage.

Frequently Asked Questions
To reset your Nest Cam Wi-Fi, press and hold the reset button for 10 seconds. Reconnect to Wi-Fi and set up the camera in the Nest app.
To get your Nest camera back online, check your Wi-Fi connection, power cycle the camera, and ensure it’s within range. If issues persist, reset the camera and reconnect it to your Nest app. You can also troubleshoot using the Nest app or contact customer support for assistance.
To do a hard reset on Nest, press and hold the Nest thermostat’s display for 10 seconds. Then release it and wait for it to restart.
To remove the previous owner from your Nest camera, reset the device to factory settings. Go to the camera’s settings in the app and choose the reset option. Follow the on-screen instructions to complete the process.
Conclusion
Resetting your Nest Camera is quick and easy. You can ensure your device functions smoothly by following the simple steps outlined in this guide. Always refer to the official Nest support resources for troubleshooting needs. Keep your Nest Camera secure and optimized for top performance.
As an Amazon Associate, I earn from qualifying purchases
Leave a Reply